A fisherman and tech guy at heart.
Ross Berntson
VP Sales Marketing and Tech Support
Here is a story of a PC, a thermal management problem, an advanced metal thermal interface material, a family that was about to mutiny, and a glazed donut. Spoiler alert: This story has a very happy ending.
Background: Our kitchen computer is an HP Slim Line with an AMD Athlon 32 bit processor. The entire family uses it – and it is now fully cluttered with downloads, games, school programs – you name it. The tray is filled with programs from who knows where. In other words, it is the typical family computer – cluttered, SLOW, and NOISY.
Scene 1: My family began complaining about the computer’s resultant speed. Being a tecchie, I immediately activated the CPU monitor, learning that it often was not running at full speed. The family also complained that simply booting the computer up was taking forever.
The complaints grew more dramatic with every passing day.
Scene 2: My personal complaint was that the fan was excessively noisy. During dinner and breakfast, with no one working on the computer, the fan would cycle on and off at FULL SPEED. WRRRRRRR (fan noise) – pause – WRRRRRR – pause – WRRRRRR. Aaargh!
Scene 3 (things get intriguing): Initially, I thought the fan was bad. However, my tech support mind got going and I hypothesized that what we had on our hands was a thermal management challenge. I decided to replace the Thermal Interface Material (TIM) with Indium’s high-end metal Heat-Spring® Thermal Pad. Mindy Macisco, Product Support Specialist for TIMs, had some of our advanced Heat-Springs® on her desk and gave me one to try.
Scene 4 (taking action):
REMOVING THE POLYMER BASED TIM
With no difficulty, I pulled off the case, unscrewed the heat sink, and observed the gre ase-type TIM on the backside of the lidded package. The
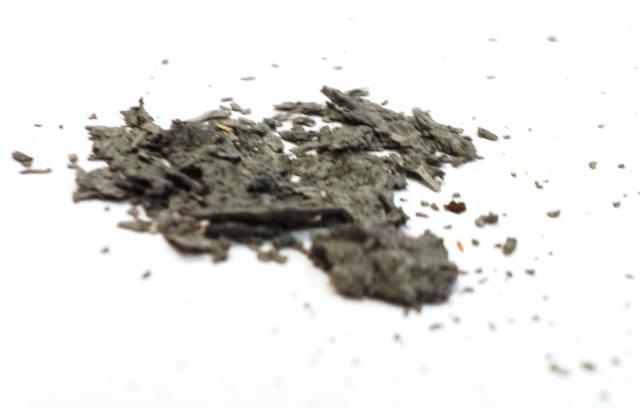
  heat sink was an integrated heat-pipe and fan assembly with spring loaded 4-point screw fasteners. I grabbed my putty knife from my shop and set to work on removing the grease, thinking it would be a sticky mess. Nope. It had dried into a flaky crust (image – left). It scraped off cleanly, with almost NO greasiness. I was reminded of glaze falling off an old dried-up donut (image – right). I used a little WD-40 to do the final cleaning.
INSTALLING THE HEAT-SPRING®
Installing the Heat-Spring® thermal pad was easy. I simply placed the TIM in the center of the CPU lid and began reassembling with a random tightening of the screws (tightening each a little bit before seating them completely). As my friend Guido says, ‘Easy peasy’.
Scene 5 (resolution):
RESULTS
For the family, the computer is instantly faster! For me, no more WRRRRRRRRRR. The Heat-Spring® metal thermal interface material solved BOTH problems!!!
Fade to black as I head out the door with my fly rod!


